Step-by-Step Instructions to Include Your Website Content in the Search Results
Introduction
The top search engines strive to deliver high quality and relevant information in the search engine results pages (SERPs) offering the best possible experience to the internet searcher. In order to rank at the top of Google, Bing, and Yahoo for top search key phrases, website owners are encouraged to publish keyword rich content on their websites to offer the freshness the search engines demand.
How do you tell the search engines about your new content?
In this tutorial, I will explain step-by-step how to suggest your website pages and articles to the top search engines. Many website owners and web administrators have completed most of the steps below, so I will list out the steps for those who’d like to skip to each section.
- Create an XML sitemap
- Verify your website with Google and Bing Webmaster Tools
- Submit your Sitemap
- Include your Sitemap location in a robots.txt file
Part 1: Creating an XML Sitemap
Sitemaps are a way to tell Google (and other major search engines like Bing & Yahoo) about pages on your site they might not otherwise discover. Google doesn't guarantee that they will crawl or index all of your URLs listed. However, they use the data in your Sitemap to learn about your site's structure, which will allow them to improve their crawler schedule and do a better job crawling your site in the future.
XML Sitemaps for static website content
If your website is a standard HTML website, generally a simple site that is not database driven, you will need to create your XML sitemap manually. Some web administrators enjoy writing code by hand, but for those who like to use online tools, I recommend the Sitemap generator available at XML-Sitemaps.com (Maximum 500 pages will be indexed in sitemap). You might notice some options to configure the crawl rate. I recommend leaving the default values unless you are an experience web development optimization expert who understands how crawl rates can effect your inclusion in the search index.
XML Sitemaps for dynamic websites
If your website is running on a content management system (CMS) like WordPress, Joomla, osCommerce, or Drupal, to name a few, then you have the option to dynamically generate your XML Sitemap. Each CMS is a little different, but the process is very similar. Generally the XML Sitemap generator is either already built-in to the system or can be easily obtained by installing a basic plugin.
Pro tip: I personally recommend the Google XML Sitemaps plugin for WordPress available here.
Upload and test your sitemap
Now that you’ve created your XML Sitemap, upload it to the root of your website on your hosting account. NOTE: XML Sitemaps are automatically placed on the web server if your website is running on a CMS. Ensure your Sitemap works by simply visiting the Sitemap URL. Most common URL for a sitemap is yourwebsiteaddress.com/sitemap.xml (replacing yourwebsiteaddress.com with your domain name of course). Mine is located here if you’d like to take a look.
Part 2: Verifying Your Website with Google and Bing Webmaster Tools
Web development optimization and search engine optimization experts love Google and Bing Webmaster Tools. Both allow you to view your indexing status, check for crawl errors, submit Sitemaps, view search queries, check your website’s health, and the list goes on. In this tutorial, we will be utilizing these no-cost services to submit our XML Sitemap.
Google Webmaster Tools
To get started, you must verify your website with Google. Follow these simple steps to complete the verification process.
- Sign in or create an account at https://www.google.com/webmasters/tools/
- Click the “ADD A SITE” button in the upper right hand corner

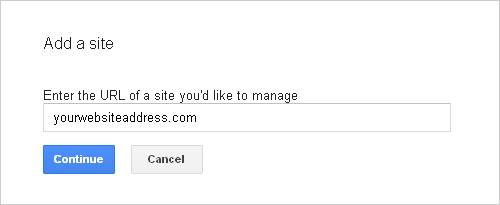
- Enter your preferred website address in the text field (you do not need to add http://) and click the “Continue” button. It is very important to enter your preferred URL, either the www version or the non-www version.
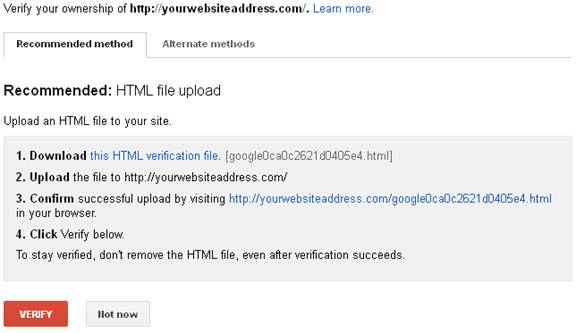
- The next screen will offer a few ways to verify you are the owner of this domain name. The recommend verification method is to upload a file to the root of your web server. You can view the alternative methods by clicking the corresponding tab. Follow the steps on screen and click then click the “Verify” button.
- Success! Verification should be complete.
Bing Webmaster Tools
The verification process with Bing is very much like Google. Follow these simple steps to complete the verification process.
- Sign in or create and account at http://www.bing.com/toolbox/webmaster/
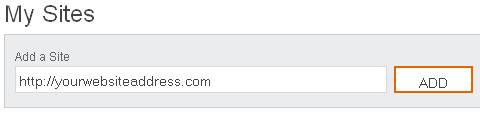
- Enter your preferred version of your website address in the text field and click the “ADD” button.
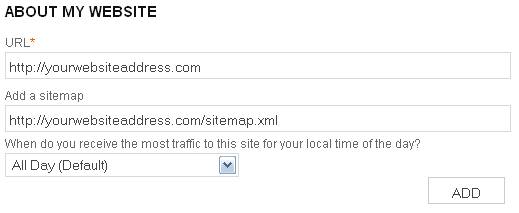
- Bing allows you to conveniently add your Sitemap on this screen. I’ve shown an example of what the Sitemap location would look like, however, we will be explaining how to add Sitemaps to Bing separately later in this tutorial. Verify that your website address is entered correctly and click the “ADD” button.
- You will be redirected back to the dashboard. Scroll down until you see you newly added domain name and click on the “Verify now” hyperlink.

- Bing also provides alternative verification methods and recommends uploading an XML file to the root of your web server similar to the Google verification. Follow the steps and click the “Verify” button.

- Success! Verification should be complete.
Part 3: Submitting Your XML Sitemap
The following steps will assist you in submitting your XML Sitemaps to Google and Bing for inclusion in the search index.
Submitting Your XML Sitemap to Google
- Sign in to your Google Webmaster Tools account at https://www.google.com/webmasters/tools/
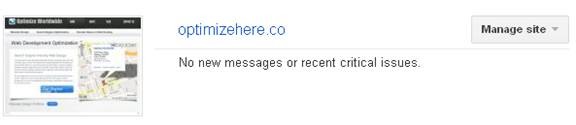
- Scroll down until you find the website you’d like to add a Sitemap to. Click on the domain name.
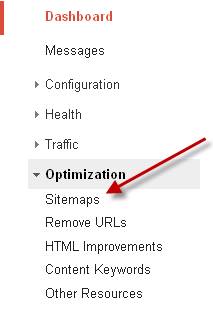
- Expand the “Optimization” menu and click on “Sitemaps”
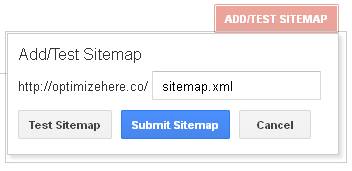
- Click the “ADD/TEST SITEMAP” button to open the window shown below. Enter your Sitemap file name exactly as it appears on your web server. Most common file name for an XML Sitemap is sitemap.xml. Click the “Submit Sitemap” button.
- That’s it! The status of your Sitemap should show “Pending” at this point. Check back later to ensure there are no reported errors.
Submitting Your XML Sitemap to Bing
- Sign in to your Bing Webmaster Tools account at http://www.bing.com/toolbox/webmaster/
- Scroll down and click on the domain name you’d like to add a Sitemap to.

- Expand the “Configure My Site” menu and click the “Sitemaps” link.

- Click the “SUBMIT A SITEMAP” button.

- Enter you the full Sitemap location, including your domain name, and click the “SUBMIT” button.

- That’s it! The status of your Sitemap should show “Pending” at this point. Check back later to ensure there are no reported errors.
Part 4: Including Your Sitemap Location in The robots.txt File
What is robots.txt? The robots exclusion protocol (REP), or robots.txt is a text file webmasters create to instruct robots (typically search engine robots) on how to crawl & index pages on their website. The most common use of a robots.txt file is to allow for auto-discovery of your Sitemap. By including the location of your Sitemap in your robots.txt file, you help Google, Bing, and many other search engines locate a listing of all of your web pages and articles.
Creating a robots.txt file
- Open Notepad and enter the following text on the first line.
User-agent: * - Save the file as robots.txt
- Upload the robots.txt file to the root of your web server
Adding the location of your Sitemap to the robots.txt file
- Simply add the following line to your robots.txt file.
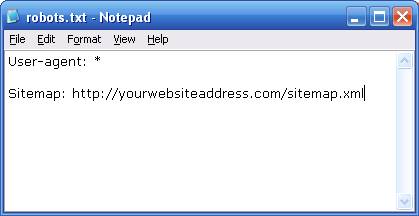
Sitemap: http://yourwebsiteaddress.com/sitemap.xml (replacing yourwebsiteaddress.com with your domain name of course). - Save and upload to the root of your web server
Your robots.txt file should look something like this:
Conclusion
Let’s wrap it up
Creating XML Sitemaps is great way to increase your visibility on the major search engines. They provide a roadmap to each section of your website and allow for faster search engine indexing. While some of you might find this tutorial basic, Sitemap submission is too often overlook and under utilized. It’s a simple process that can work wonders for your online visibility.
I truly enjoy offering search engine optimization tips and training. Please don’t hesitate to reach out to me personally for help implementing any tips that I offer. You can follow me on Twitter @MattMorgan105, read more of my tips on Google+ by adding me to your circles, or by subscribing to my blog.
 About The Author
Matt Morgan is the CEO and founder of SEO firm Optimize Worldwide based in Redding, California. He has a strong background in online marketing and has put together a team of industry experts who are passionate about search engine optimization. Optimize Worldwide helps local & nationwide companies gain more online exposure through website optimization. Offline Matt enjoys riding motorcycles, taking advantage of the surrounding recreation, and gardening with his wife Holly.